Best Practices for Cleaning and Lubricating Antique Typewriter Gears
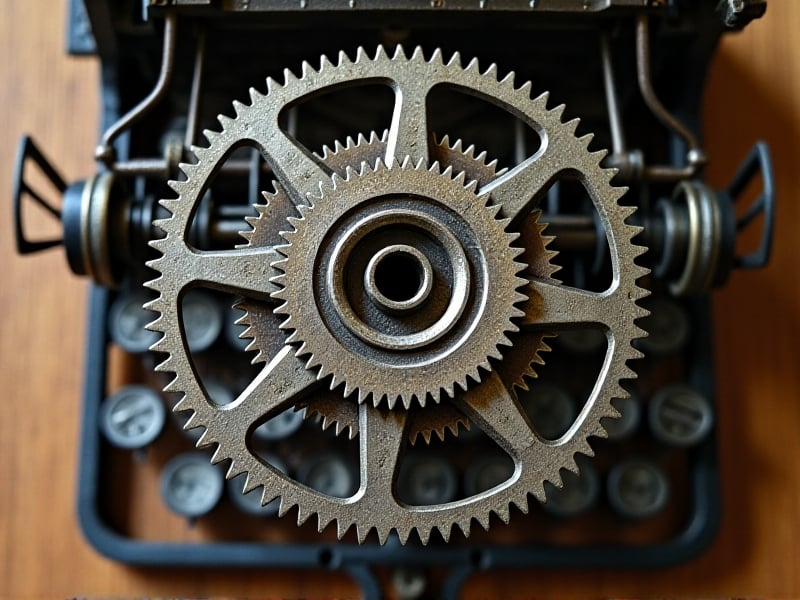
Understanding the Anatomy of Antique Typewriter Gears
Before diving into the cleaning and lubrication process, it’s essential to understand the anatomy of antique typewriter gears. These gears are intricate components that work together to ensure smooth operation. Typically made of metal, they are prone to rust, dust accumulation, and wear over time. The gears are often interconnected with other parts like the typebars, carriage, and ribbon mechanism, making their maintenance crucial for the overall functionality of the typewriter.
Antique typewriters often feature brass or steel gears, each with unique properties. Brass gears are softer and less prone to rust but can wear down more quickly. Steel gears, on the other hand, are more durable but susceptible to corrosion if not properly maintained. Understanding these materials helps in selecting the right cleaning agents and lubricants to avoid damage.
When examining the gears, look for signs of wear, such as uneven teeth or excessive play. These issues can affect the typewriter’s performance and may require more than just cleaning and lubrication. Taking the time to familiarize yourself with the gear system will make the maintenance process more efficient and effective.
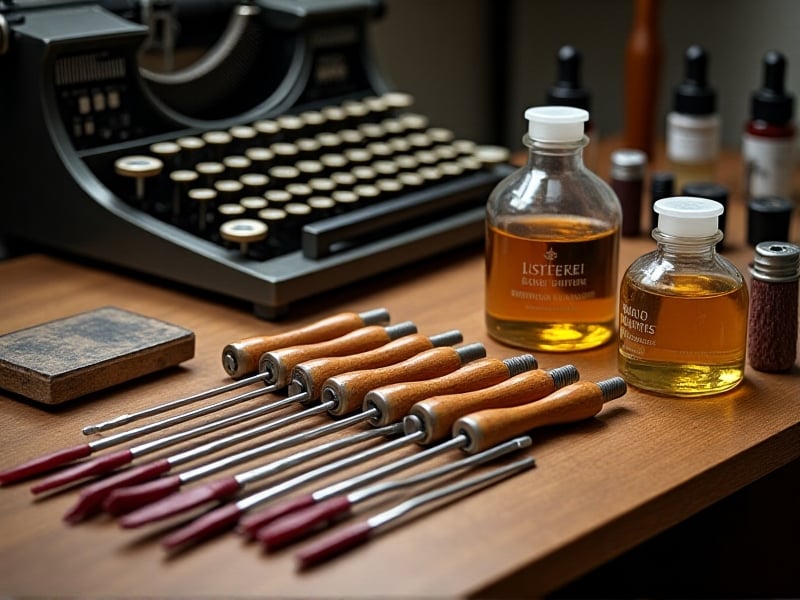
Gathering the Right Tools and Supplies
Having the right tools and supplies is crucial for cleaning and lubricating antique typewriter gears. Start with a set of precision screwdrivers to disassemble the typewriter carefully. You’ll also need a soft-bristle brush, such as a toothbrush or a specialized cleaning brush, to remove dust and debris from the gears.
For cleaning, use a mild solvent like isopropyl alcohol or a specialized metal cleaner. Avoid harsh chemicals that can damage the gears or strip away their protective coatings. A microfiber cloth is ideal for wiping down the gears after cleaning, as it won’t leave lint or scratches.
When it comes to lubrication, choose a high-quality, non-greasy lubricant specifically designed for metal gears. Products like sewing machine oil or synthetic lubricants work well. Avoid using WD-40 or similar products, as they can attract dust and debris over time. Having these tools and supplies on hand will ensure a smooth and effective maintenance process.
Disassembling the Typewriter Safely
Disassembling an antique typewriter requires patience and precision. Start by removing the outer casing, taking care not to force any parts. Use your precision screwdrivers to unscrew the components gently. Keep track of all screws and small parts by placing them in a labeled container or magnetic tray.
Once the casing is removed, you’ll have better access to the gears. Take note of how the gears are interconnected, as this will help during reassembly. If possible, take photos or make sketches of the gear arrangement to serve as a reference.
Be cautious when handling the gears, as they can be delicate. Avoid using excessive force or tools that could cause damage. If you encounter resistance, double-check for any hidden screws or clips that may still be holding the components together. Taking your time during disassembly will prevent unnecessary damage and make the cleaning process more manageable.
Cleaning the Gears Thoroughly
Cleaning the gears is a critical step in restoring an antique typewriter’s functionality. Begin by using the soft-bristle brush to remove loose dust and debris from the gears. Work carefully to avoid bending or breaking any of the gear teeth.
Next, apply a small amount of isopropyl alcohol or metal cleaner to a microfiber cloth and gently wipe down the gears. For stubborn grime or rust, use a cotton swab dipped in the cleaning solution to target specific areas. Avoid soaking the gears in liquid, as this can lead to corrosion or damage to other components.
After cleaning, use a dry microfiber cloth to remove any residual cleaner. Ensure the gears are completely dry before proceeding to lubrication. This step is crucial, as any remaining moisture can interfere with the lubricant’s effectiveness. A thorough cleaning will leave the gears looking shiny and ready for the next step.
Applying the Right Lubricant
Lubricating the gears is essential for ensuring smooth operation and preventing wear. Start by applying a small amount of synthetic lubricant or sewing machine oil to each gear. Use a precision applicator or a cotton swab to control the amount of lubricant and avoid over-application.
Work the lubricant into the gear teeth by gently rotating the gears. This helps distribute the lubricant evenly and ensures all moving parts are coated. Be cautious not to apply too much lubricant, as excess can attract dust and debris, leading to future issues.
After lubricating, manually rotate the gears a few times to ensure they move smoothly. If you notice any stiffness or resistance, reapply a small amount of lubricant as needed. Proper lubrication will extend the life of the gears and improve the typewriter’s overall performance.
Reassembling the Typewriter
Reassembling the typewriter is the final step in the maintenance process. Begin by referring to the photos or sketches you took during disassembly to ensure all components are placed correctly. Start with the gears, carefully aligning them with their corresponding parts.
Once the gears are in place, reattach any interconnected components, such as the typebars and carriage. Use your precision screwdrivers to secure the screws, taking care not to overtighten them. Over-tightening can cause stress on the gears and other parts, leading to potential damage.
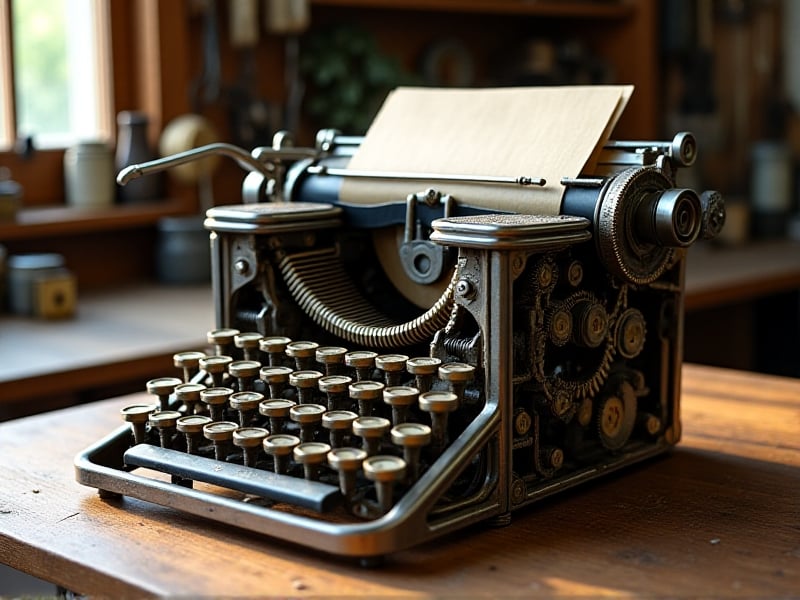
After reassembly, test the typewriter’s functionality by typing a few lines. Listen for any unusual noises or resistance, which may indicate a need for further adjustment. If everything operates smoothly, your antique typewriter is ready for use or display. Proper reassembly ensures the typewriter remains in excellent condition for years to come.
Preventative Maintenance Tips
To keep your antique typewriter in top condition, regular preventative maintenance is essential. Start by storing the typewriter in a clean, dry environment to prevent dust accumulation and moisture-related issues. Use a dust cover to protect it when not in use.
Periodically inspect the gears for signs of wear or debris buildup. A quick cleaning and lubrication every few months can prevent more significant issues down the line. Avoid using the typewriter in dusty or humid conditions, as these can accelerate wear and corrosion.
Finally, handle the typewriter with care, especially when moving or transporting it. Sudden impacts or drops can damage the gears and other delicate components. By following these preventative maintenance tips, you can ensure your antique typewriter remains a functional and cherished piece for years to come.